Inside the XYZprinting Da Vinci Cartridge

As an exercise, let’s take apart XYZprinting’s proprietary cartridge to see what lies underneath. It is actually very easy to open it up, like shucking a giant plastic oyster. First, remove the pesky sticker that straddles the two halves of the shell.

IMG_0568

Press down at the seam on one side, enough for you to get a finger or part of a finger inside. Apply some force and pry it open. With enough willpower, you will hear the tabs snapping apart.

IMG_0569

What you will see inside: Reel wound with ABS filament, electronic chip, and desiccant

IMG_0570 IMG_0572

Close-ups of the chip, aka, filament counter. The culprit preventing you from using non-XYZ filaments. We’ll see about that…

IMG_0571

Set the reel of ABS filament free!

Next up, how to reset the filament counter chip

Can You Bet on 3D Printing?

I have always wondered what makes a die fair, and lately wondered whether a 3D printer can build a fair die —

photo (1)

Die on the left is 3D printed and the die on the right is comparison die from a board game set. The 3D-printed die was designed so that the dots take up equal volume on each face. As you can see, each dot on the 3-face are deeper than each dot on the 6-face. It doesn’t look like the comparison die has this feature, each dot on it look around the same size as any dot on any of its faces.

With the help of a “volunteer”, we went through the tedious task of rolling each die a couple of hundred times to test its fairness. Here are the results in number of times a number between 1 to 6 was rolled (percentage):

3D-Printed Die

1: 49 (20%)

2: 42 (17%)

3: 33 (13%)

4: 43 (17%)

5: 44 (18%)

6: 36 (15%)


Comparison Die

1: 38 (16%)

2: 38 (16%)

3: 48 (20%)

4: 48 (20%)

5: 31 (13%)

6: 36 (15%)

Interestingly enough, with over 200 rolls, neither die seems very fair, but the range for the chance of rolling any number between 1 to 6 is between 13% and 20% for both dice. Standard deviations for the 3D-printed and comparison dice are 2.4% and 2.8%, respectively.

The sample sizes may be too small, but this quick-and-dirty study shows that a 3D-printed die, with engineered dots 🙂 can prove just as fair as a die that wasn’t made through 3D printing. It also means that, with a bit of back-and-forth design, print, and testing, you can make loaded dice very easily. Imagine the possibilities!

Can 3D Printing Turn YOU into a Super-Handyman?

I tend to think that those who buy 3D printers for personal use these days fall into one of the following three categories:

  1. Embracer of new technology, regardless of relevance
  2. Having heard of the recent hype and maybe even used one before, and the price point has now dropped to an acceptable level for them
  3. People with some familiarity of 3D design software (SW, Rhino 3D, etc.), who is now quite dangerous as the owner of a printer

People who fall into the first category are also the ones who bought a MiniDisc player in the late 90’s, and probably a 4K television last year. They will buy it and show it off to uphold their reputation as tech freaks.

Categories 1 and 2 need not to be mutually exclusive. With the number of 3D printer with price tags below $1,000 doubling every month, a large number of budget-minded tech embracers will undoubted jump on the bandwagon. They will figure out ways to use it, and know that online model libraries are available with thousands of designs ready to be sliced. They may tinker with 3D design themselves, and trust me, they will get a well-earned thrill when their first extruded cylinder is printed. Why? Because they spec’d it and built it.

This brings me to the third category, those familiar with design and design software, and if they already know how to repair and build things, well, the arrival of the affordable 3D printer is the promised land. The ability to design followed by 3D printing is the ultimate augmentation for a handyman. No longer are you browsing the isles at Home Depot hopelessly for that missing part. Instead, you walk out of there with just a pair of calipers, go back home, open up Inventor, and you are Clark Kent no longer.

I believe this is what Barack Obama was alluding to when in the State of the Union address he said “3D printing has the potential to revolutionize the way we make [almost] everything.” I emphasize almost because many things will still be mass produced. Only a few will care too much to customize an $8 stapler in order to spend two hours printing one. However, that weird piece of plumbing fitting that you really need for your leaky drain and can only be found in one hardware store in your city will likely stop being stocked once the 3D-printing revolution is done. Why? It probably doesn’t sell well now (too custom and low demand) and a designer/handyman armed with a printer will now save more time to measure out the part, design it and build it (maybe once or twice to get it right) at home.

You might say “I don’t know many handymen who can use Solidworks.” Well, I’m a handyman and two years ago I couldn’t use any 3D design software. The next generation of handymen will have taken 3D-design and printing classes in high school, and those who excelled will fall into the third category when they buy their own printer later on. There is a good chance they like to build and repair things. Remember that 3D printers were developed by tinkers, for tinkers.

Now let’s take a look at some of the handywork around the house a 3D printer can really help with—

Remote

So my dog has a habit of gnawing on everything that I hold in my hands or wear on my feet. The battery cover on my TV remote became a casualty. It was a quick fix after spending about 20 minutes on Rhino designing it and another 20 minutes to print it and file it down a little for the perfect fit.


AltecLansing

I must be borderline OCD, because I found it hard to deal with a missing bass knob on my computer speakers. I found my therapist in the form of a 3D printer. This took me a few tries to get it right, and in the end I printed a treble knob too to make it match.


The next one is my favourite, because I feel like my home reflects my personality and style, and I’ve created something truly custom and functional—

Shelf

These shelf supports in my bathroom are printed in black ABS and weighs less than an ounce each. The original supports became unusable, but my desire to keep the nice patterned glass shelf drove me to design and print new supports. Though I wasn’t completely sure ABS would be heavy-duty enough to support the shelf and the toiletries that will be placed on it. The key was keeping the weight of the supports down. A decorative truss design did the trick.

LoadedShelf

Here it is in action. In improving function, I designed in a low-profile hook for hanging things. I have to say, black ABS just looks amazing, and with the right design, will bring with it a wrought-iron look.


photo

A look at my trusty calipers for all the precision measuring. I looked long and hard to find a 8″ one to complement my Da Vinci 1.0 which has a build size of 8″x8″x8″.

FDM 3D Printing and Minimizing Laminate Weakness

One of the many issues that is preventing 3D printing from attaining credibility in manufacturing is that items built via the most popular method, fused deposition modeling or FDM, suffer from laminate weakness; the strength of the part will always lag behind the same part manufactured through a traditional mass production method such as injection molding. It’s true, injection molding processes, when optimized by the engineer will produce a part that will have uniform strength in every direction, whereas the FDM-built part will be weaker along the directions where successive layers are laid down and perpendicular to the direction of motion of the extruder. However, it may be worthy to mention that a new injection molding process is often plagued with problems during startup, and issues such as polymer blistering, burns, and voids to mention a few produces the same end result – material weakness. So, how does a 3D-printing zealot overcome laminate weakness? Let’s first illustrate the problem with this 3D-printed die that I made:


DSCF7004We’ll say that greenorange, and red are the x, y, and z axes, respectively.

If we consider tensile strength (a material property that measures the amount of force required to cause failure – in this case the different layers to come apart), this die will be the strongest if tensile force is applied along the x-axis. It will not be as strong along the y-axis, and it will be the weakest along the z-axis. The reason behind this is that, after the shell is drawn for each layer, extrusion is continuous along the x-axis, whereas along the y-axis, there is a time delay before the next line of polymer is fused with the adjacent line, when the extruder is on its way back from the end of the line. This sequence is dictated by the slicing software and with a single extruder head there is no other way to build with FDM. During the time delay before the next line is fused, the polymer hardens and cools, but must fuse with the next line of molten polymer that gets laid down. The cooler the previous line, the weaker the bond with the next line. Consequently, the delay between laying down layers along the z-axis is the longest; hence, it is your weakest axis. Near the beginning of the build this effect is somewhat negated as a result of the heated build platform, but most polymers are poor heat conductors and the heat from the platform (which, for an ABS build, is more than 100°C lower than the extrusion temperature) become negligible as the build gets more vertical. The end result – this die might crap out somewhere between the 1 and 6 faces, no pun intended.

Now, what are some design and printing techniques one can use to mitigate laminate weakness?

Mechanical Analysis

What does your part do and how do you intend for it to perform? What kind of forces will be acting on it? Will there be tension, compression, shear, or torsion forces? If you are printing a lever used for cranking, it might be a bad idea to situate the length of it along the z-axis, as it will be subjected to a lot of shear forces. Shear forces cause delamination in a 3D-printed part similar to how you generate shear force with your hands to peel away at an orange. In addition, do you see all of those ridges along the z-axis of the die? Engineers call those “stress concentrators”, which magnifies the shear force. Think of the foil paper covering a cup of yogurt with the corner ready for you to pull back on. Every ridge is one of those, ready to initiate delamination in your part. Instead, you would rotate the model in your slicing software and lay that lever flat.

Shells

This may be found in the advanced settings of your slicing software. Take advantage of it if you could set it manually. MakerWare lets you choose the number of shells drawn before hatching begins. XYZware gives you the option of normal, thin, and thick shells. Having thicker or more shells will allow strength to be more uniform along the x-y plane. As you can see in the die above, there are 2 shells for each layer, and each shell on each square layer means that there are 2 pairs of perpendicular lines, and make it more difficult for delamination to occur along the y-axis

Geometric Parameters

Are there areas of your model that is too thin or too narrow? The problem with something being too thin is that the printer will not be able to lay down too many layers. The more layers you have, the less likely you will experience delamination along the y-axis, because guess what, the slicer is smart enough to tell the extruder to hatch the next layer in the direction that is perpendicular to the last layer. With an even number of many layers, material strength will be exactly uniform for both the x and y axes.

As an example, take a look at where the laminate weaknesses manifested itself in the print below:

MW Screenshot SansCanvas Logos

The print on the left suffered delamination along its weakest axis, the z-axis, where there are overhangs on the letters. With a little bit of shear force from pressing down with my finger, the letter C snapped in half right where the moment and shear forces are the greatest. The print on the right, looks identical, but was laid down and built with supports on the underside. It is virtually unaffected by the laminate weakness present in FDM. In the slicer software I lined up the depth of the model with the z-axis, and along that axis, it will never be subjected to any shear or tension forces.

Yes, FDM 3D-printing may lead to mechanical deficiencies, but traditional manufacturing can too! Can it be overcome or mitigated? Yes, to both. When speaking about design engineering, features such as ribs or fillets are added to strengthen an otherwise weak part of the design. Designing for laminate weakness in 3D printing is simply another constraint the designer takes into consideration before hitting the print button.


Da Vinci 1.0 Printer by XYZprinting – A 3D Printing Renaissance in the Making? (Review)

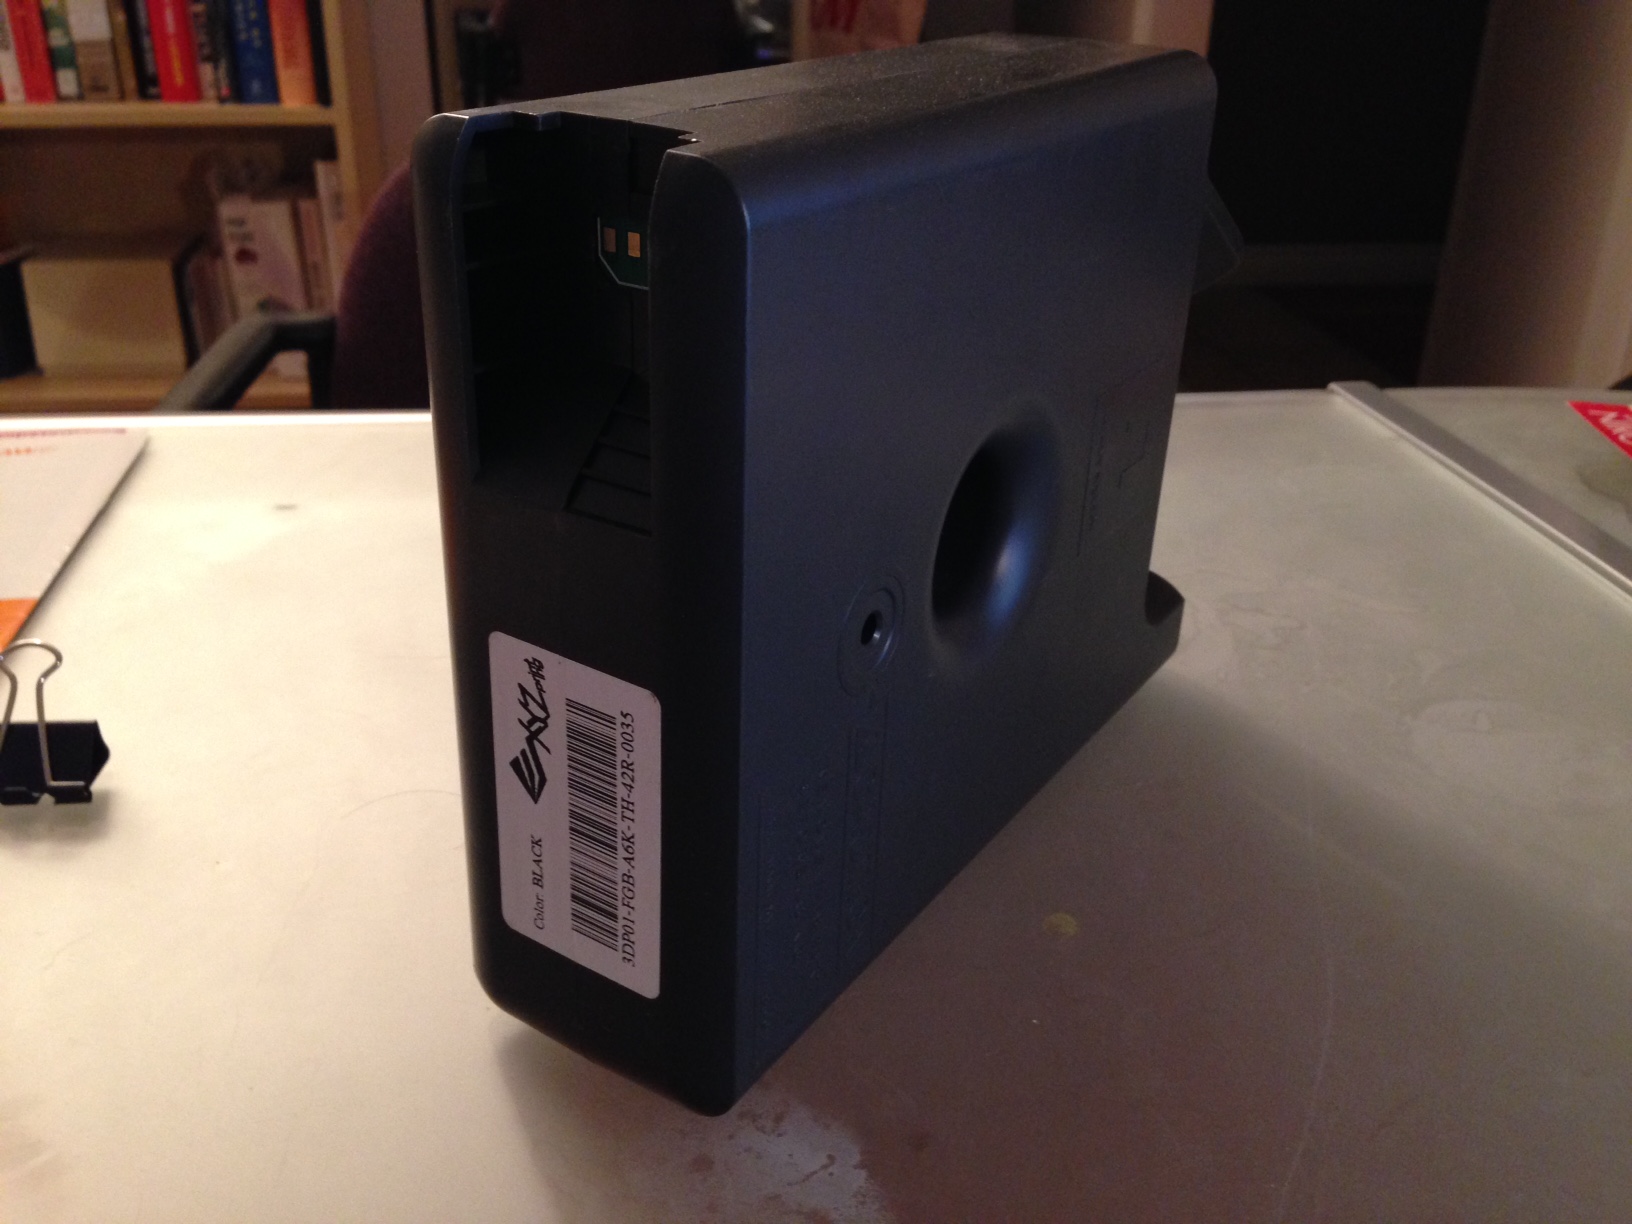
When it comes to manufacturing, inconsistency is generally bad. If there is currently anything inconsistent about 3D printers, it’s the massive spectrum when it comes to the pricing offered by the various manufacturers. Looking at the TopTenREVIEWS page for 3D printers, the rough correlation is that the price of the printer goes up with the build size. Also, it is obvious that ones looking like they might arrive in pieces inside a kit rather than fully assembled will dangle a price tag in the hundreds rather than thousands. After a few successful experiences with 3D printing for rapid prototypes during my last project I was debating the idea of owning a printer myself, but couldn’t pull the trigger due to the mixed reviews surrounding some of the popular ones, and the prospect of owning a paperweight worth a couple of grand as a result of broken extruders, belts, etc. was a daunting one.

I grappled with the decision until I came across the Tom’s Guide article Best 3D Printers 2014 which heralded the Da Vinci by XYZprinting as the best budget 3D printer. At $499 USD ($599 + tax here in Canada), it is priced for serious market disruption. With a generous build size of 7.8″ x 7.8″ x 7.8″ and delivered fully assembled and enclosed in a pleasant-looking polycarbonate enclosure, it is undercutting the competition by a large margin. It claims to be able to print as fine as 100 microns, keeping in line with many of its higher-end peers. It’s priced like an ambitious kickstarter project, but what many don’t know is that the parent company of XYZprinting is the multinational Asian conglomerate Kinpo Group with head offices in Taiwan. They make everything from LED lights to DSL modems. Unlike its pure play competitors, XYZprinting’s foray into the field of 3D printing is an interesting one, considering its roots. What appealed to me was the warranty (6 months on the extruder, motors, and heated bed, 1 year on everything else), and the notion that the build quality of the Da Vinci should reflect the QA practices of its owner, the Kinpo Group. The price was below my risk threshold. For me, it means that I can dabble in the field without losing my shirt, and I may be able to recover the cost in a short amount of time by lining up a few 3D printing jobs. After enough pondering I contacted my local distributor (Studica) and picked one up!

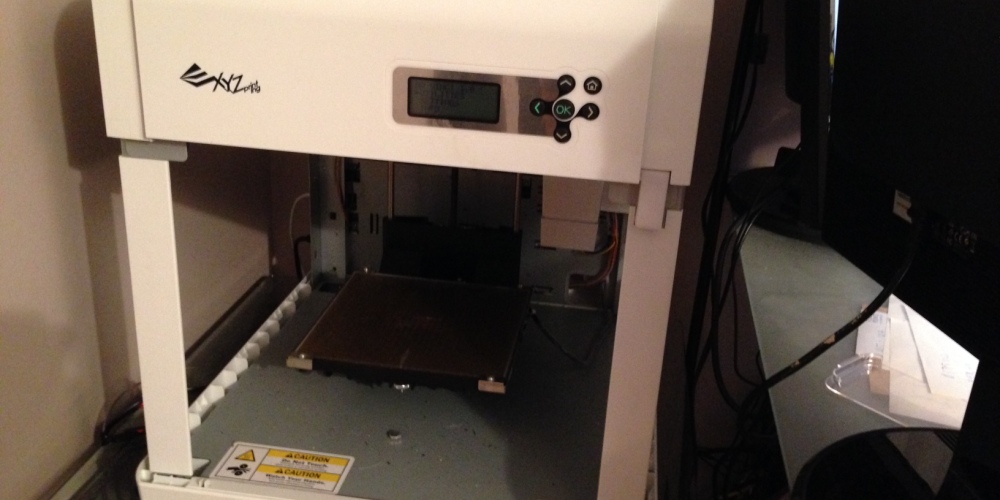
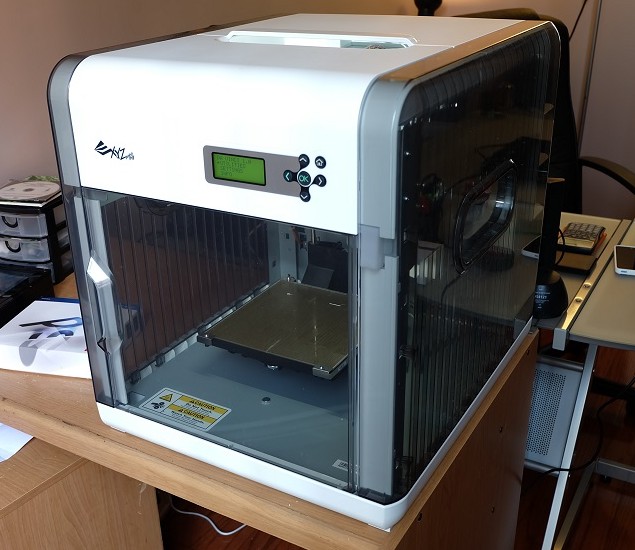
After unboxing, setting it up, and using it a few times, here are some shots –

Da Vinci Front Right Da Vinci Front Left

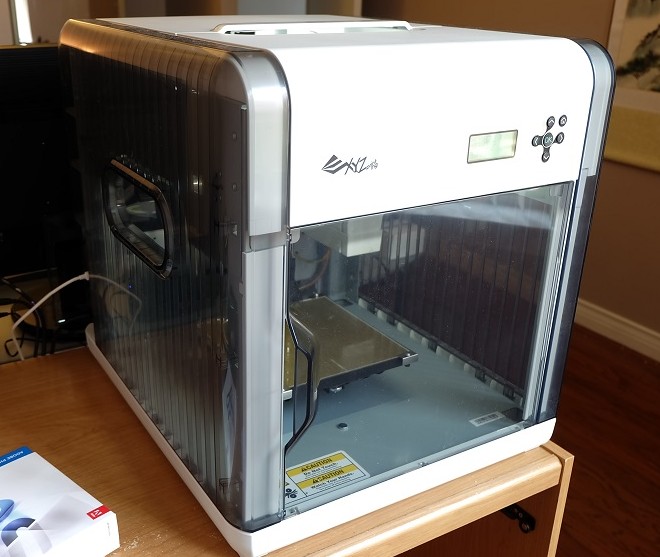
It was larger than I envisioned. The machine has already claimed a generous chunk of my office!

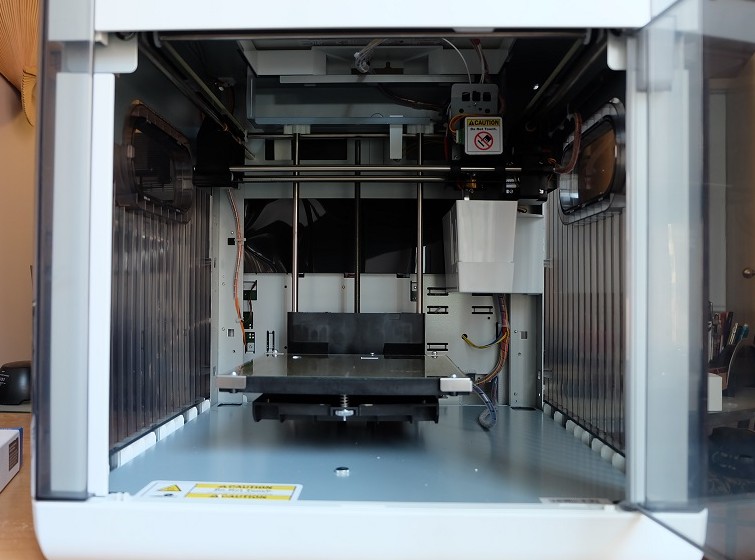
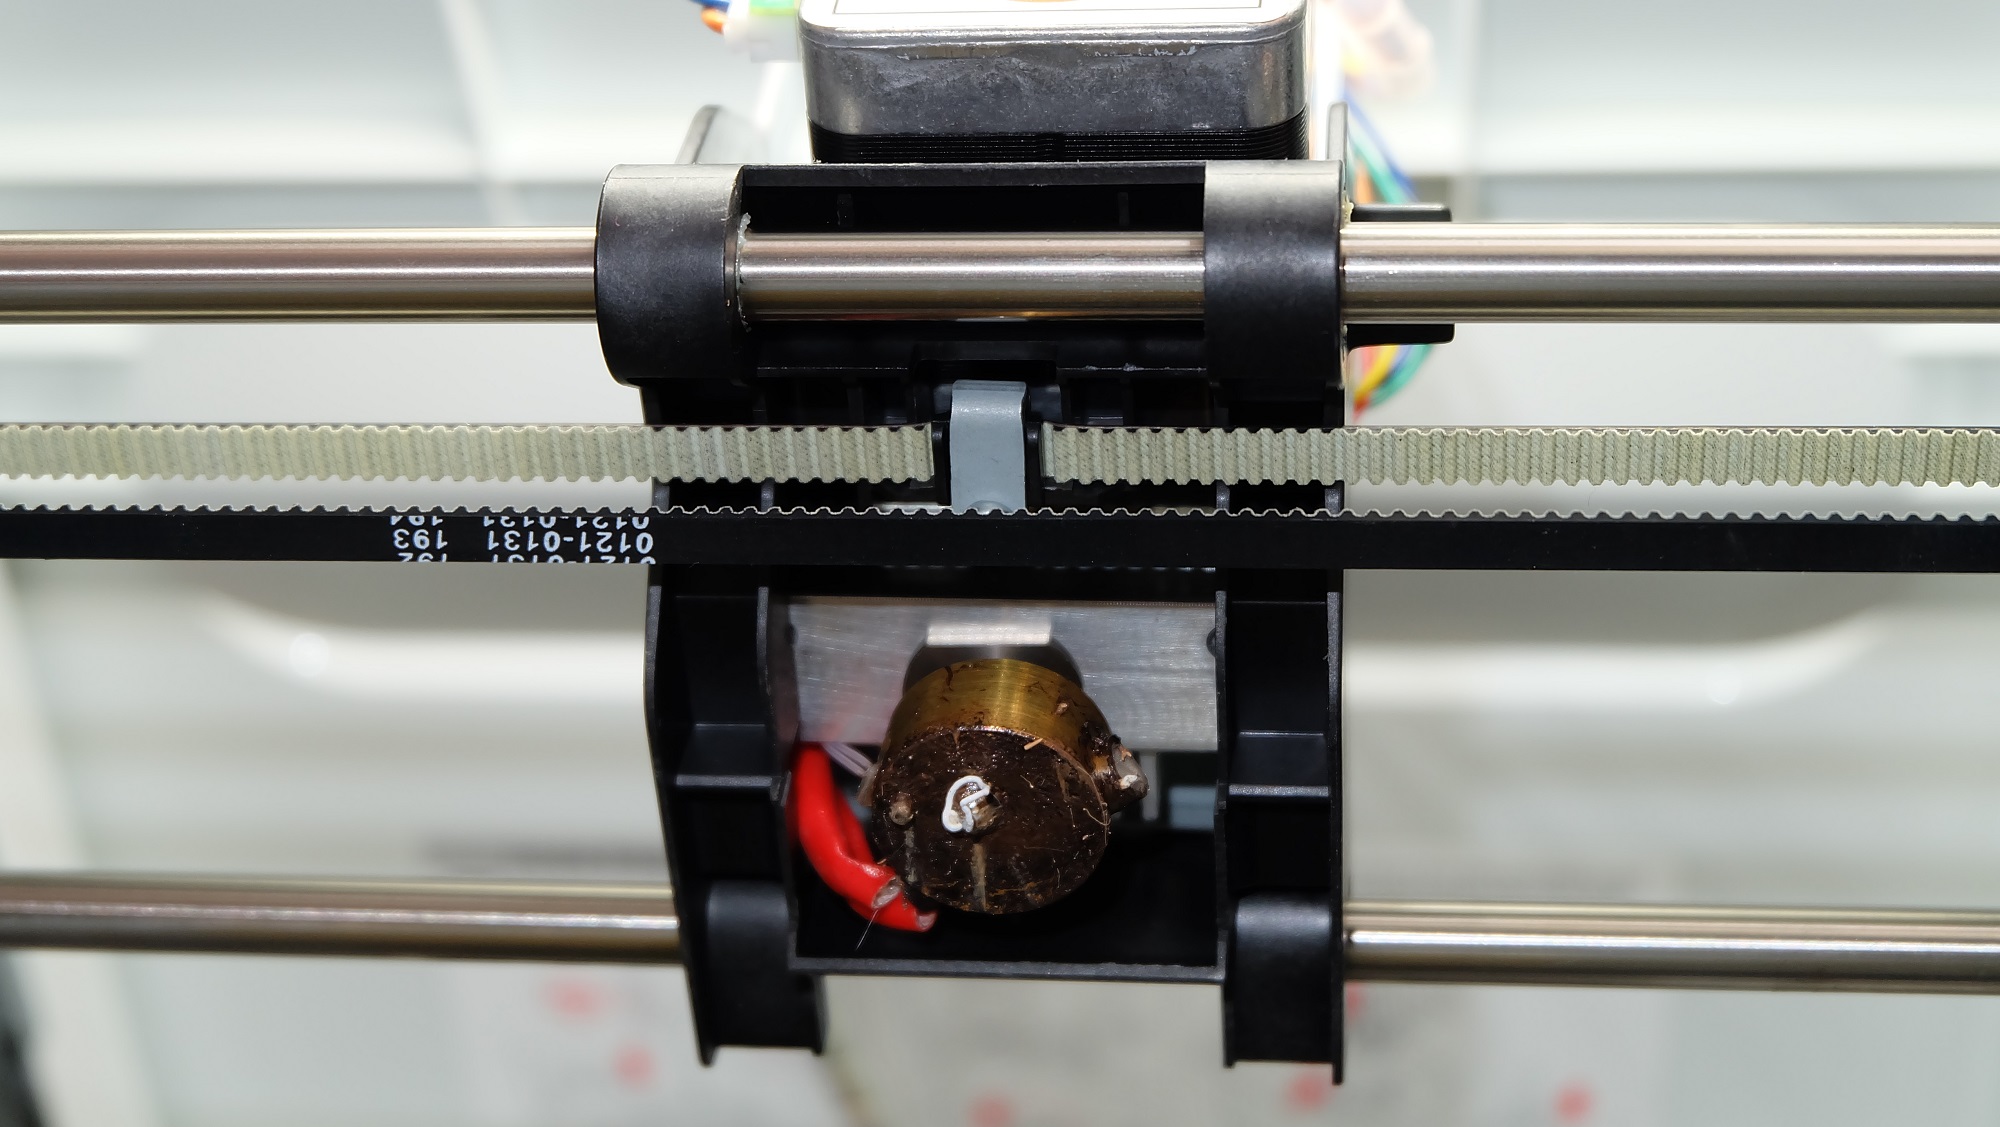
Shots of the inside –

Da Vinci Inside


Da Vinci Z-axis motor
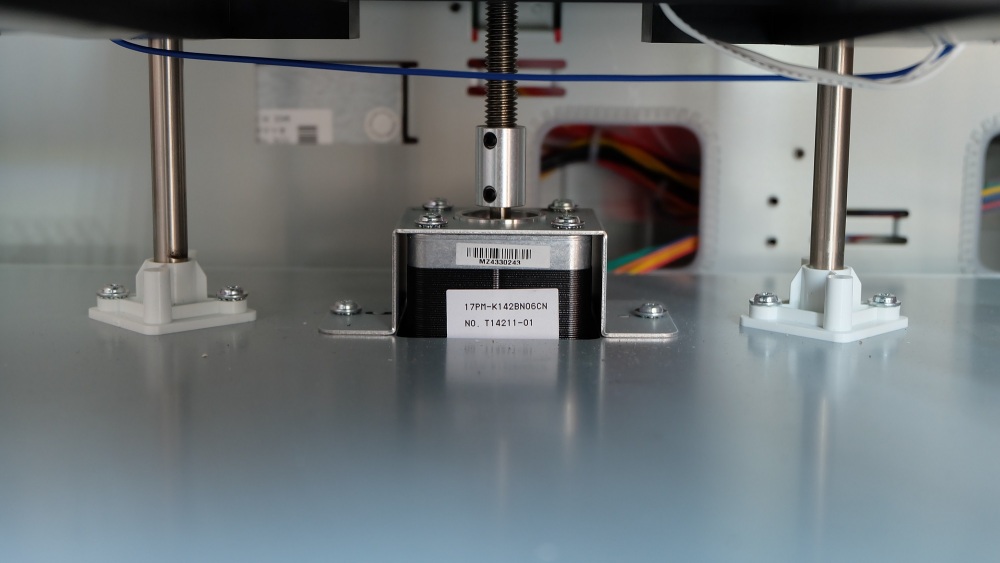
Z-axis servo motor driving a threaded rod with A LOT of threads per inch

Da Vinci X-axis motor
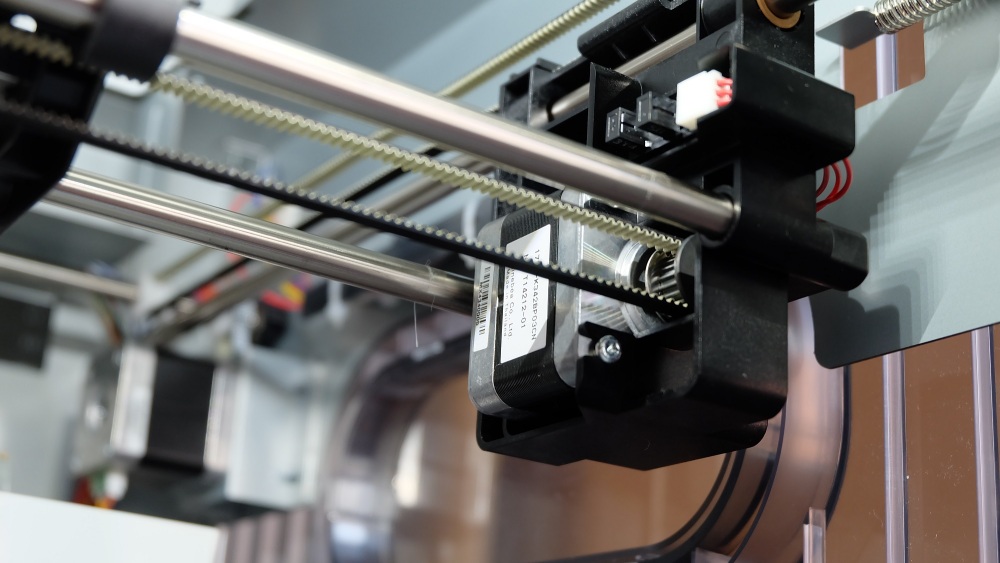
X-axis servo motor, Y-axis motor in the background

Da Vinci Extruder
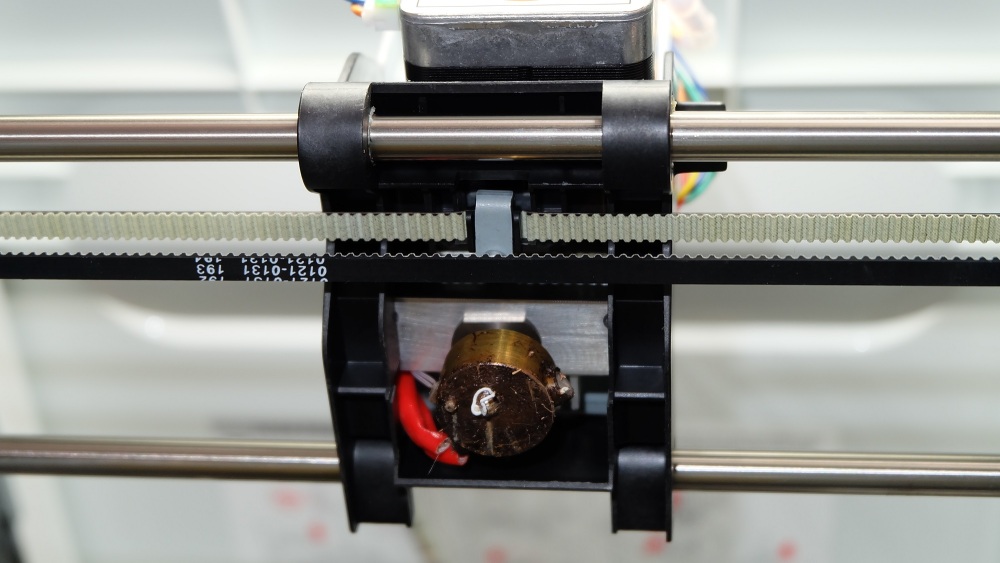
Extruder after a few uses. Notice that like a tube of caulking, some polymer will seep out after it has finished building

Da Vinci heated platformBuild platform with heat tracing circuit visible. To the right is a “drip tray” where the aforementioned polymer seepage is automatically scraped off and collected before the next build is initiated. There is a metal scraper mounted on the left side of the tray (not in focus).

IMG_0126
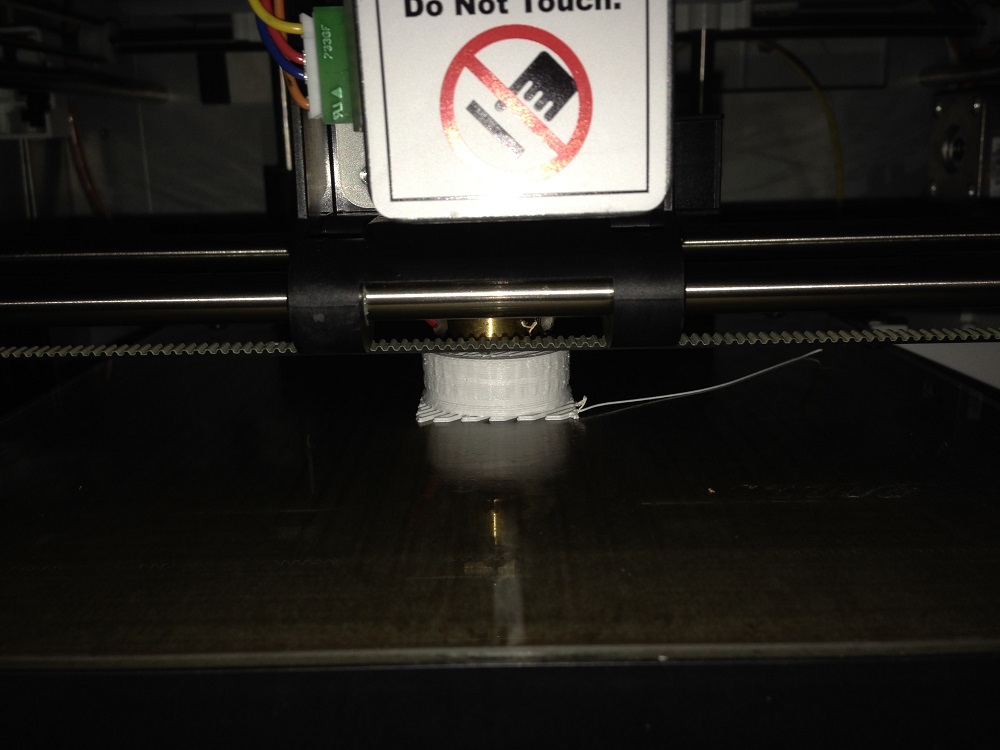
In the middle of a build. Notice that there is a line of polymer coming from the right. This is supposed to be an auto-purged line of polymer from the beginning of the build that is to remain on the side of the platform, but more times than not, it gets dragged over to the build.

The slicing software used by the Da Vinci printer is called XYZware and somewhat resembles the MakerWare used by MakerBot Replicators. However, it does not have as many features. For example, to scale the STL file before printing, you have to drag or scroll a slider rather than just input a percentage scale factor. This makes accurate scaling difficult as the slider jumps from say, 105% to 111% in one notch, which makes printing at a scale of exactly 110% extremely difficult. Sometimes, you can get the slider to land on the percentage you want by sliding it back and forth a few times, but it’s an inconvenience if I have to revisit the CAD file to scale consistently. Advanced features are available, allowing the layer height and build density to be adjusted, which is quite nice and allows for a certain level of user optimization as one gains experience on this machine. Before hitting print, a dialog box pops up to inform the user the time it will take, the length of polymer it will use, and the amount of polymer left in the cartridge.

Another nice feature is that as the dialog box appears, the model that the user uploaded previously is transformed into a “sliced” preview, which shows exactly what you can expect on the platform at the end of the build, complete with any supports or rafts which are also shown. If you don’t like what you see, simply click cancel on the dialog box, correct any mistakes, and reimport the file into XYZware. This is especially useful if the STL file contain surface errors (open polysurfaces, unjoined intersections, etc.) that is not apparent in the CAD program. The user’s keen eye can pick up on the errors on the sliced previews, and prevent the waste of both time and polymer. It would be nice if the software itself can diagnose model errors. Overall, the slicing software could use improving. In its current state it works after a bit of trial and error, which suggests that its development was rushed in order to bring the product to market quickly. I was told that there would be a software/firmware update this summer which would allow for the Da Vinci 1.0 to print in PLA in addition to ABS. Hopefully along with it there would be an overhaul of the slicer as well.

SUMMARY

While marketed as a budget printer, the Da Vinci 1.0 certainly does not feel like one. As I write this I have used the printer on average once a day for 2 weeks without a major hitch. I have printed around 15 items ranging from cell phone and tablet cases, toys, and spare parts for repair. I have stumbled on a few botched print jobs on it and wasted time and material, but a friend recently told me that such blunders are unavoidable even on $10k+ Stratasys machines. For the Da Vinci, here is what I liked, disliked, and felt indifferent about –

Liked: Exceptional value, generous build size, easy to set up, easy to clean, warranty, aesthetic appeal, safety (caution signs all over, prompts the user to close flaps)

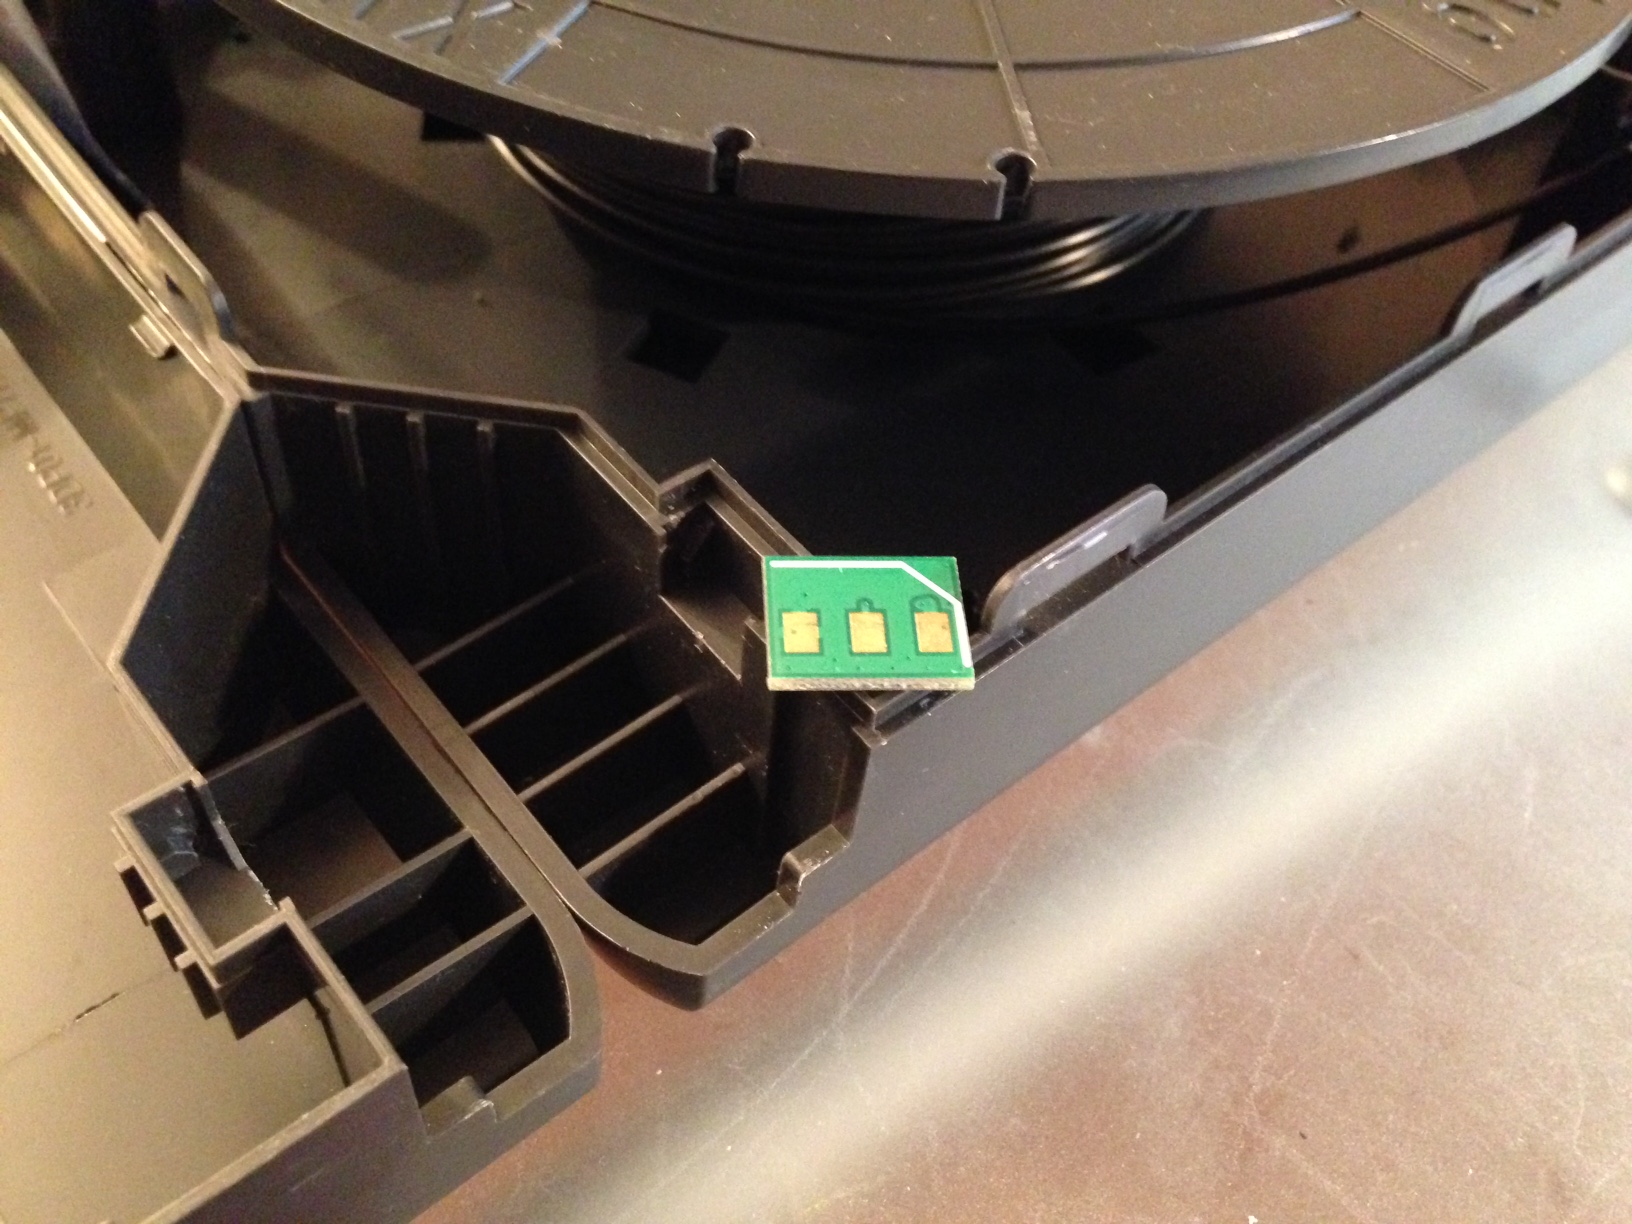
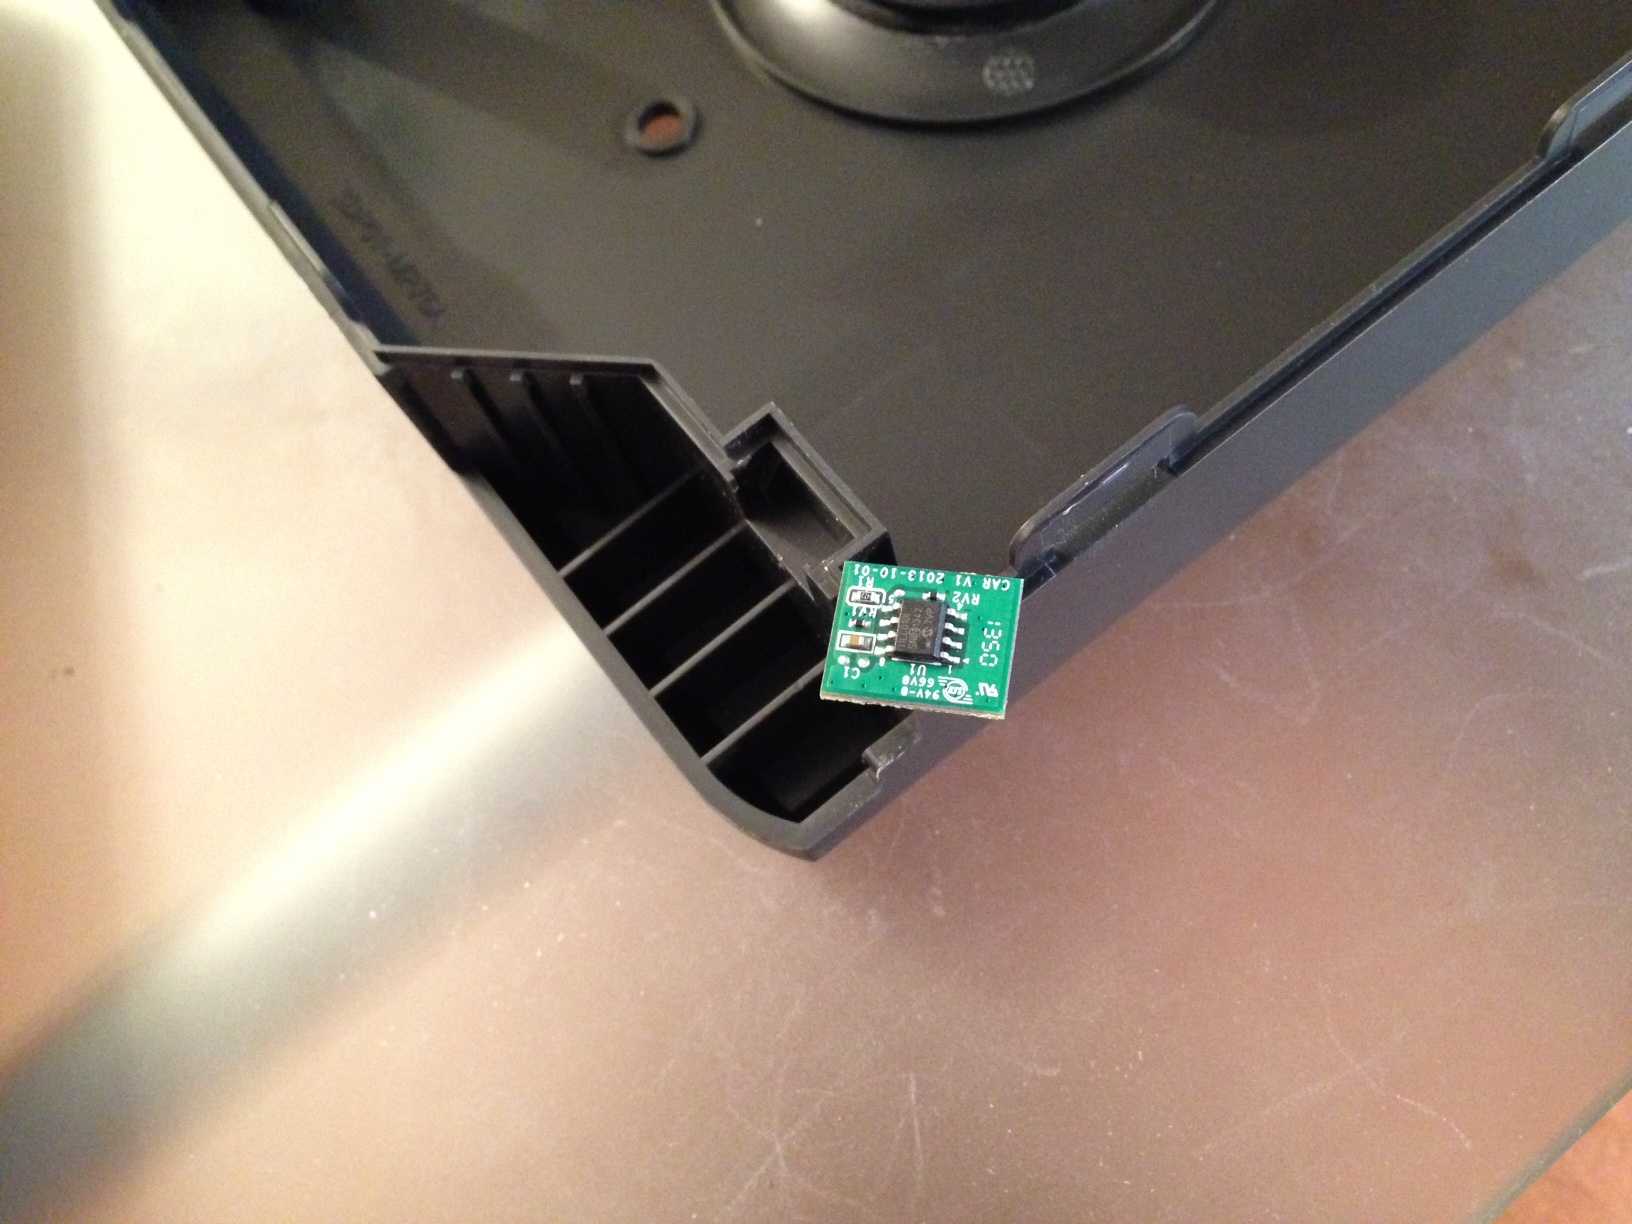
Indifferent: Proprietary cartridges, average speed, applying glue to the build platform instead of tape

Disliked: Noisy operation (groaning and screeching sounds), slicing software lacks features, platform heating is slow and not in sync with the extruder (extruder reaches temp. first, waits for the bed to finish heating, wastes energy)

After literally seeing my many ideas materialize before my eyes, I have no regrets with the Da Vinci 1.0. Only time will tell how I perceive it a year or two from now. It might be too early to tell whether a new bar has been set by XYZprinting, but I’m confident the industry is being pushed in the right direction by their product. For now, they have certainly won me over.